

The steps below are for organization admins on Team / Enterprise plans. On
Pro / Max plans, you can add the connector for yourself from Settings →
Connectors with the same steps.
1. Open the connector management screen
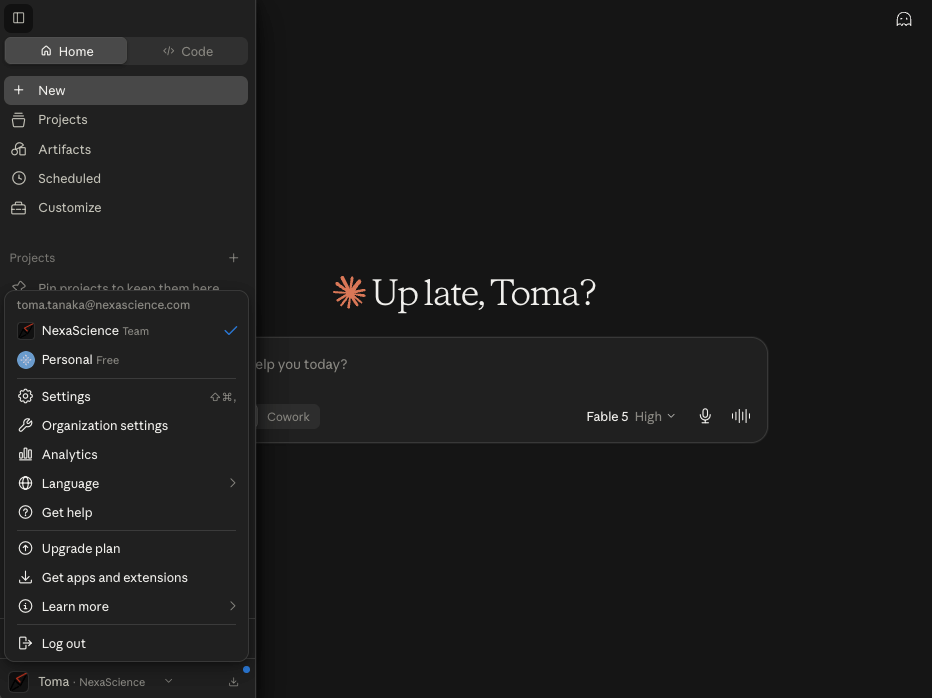
- Sign in to Claude and open Organization settings from the account menu at the bottom left
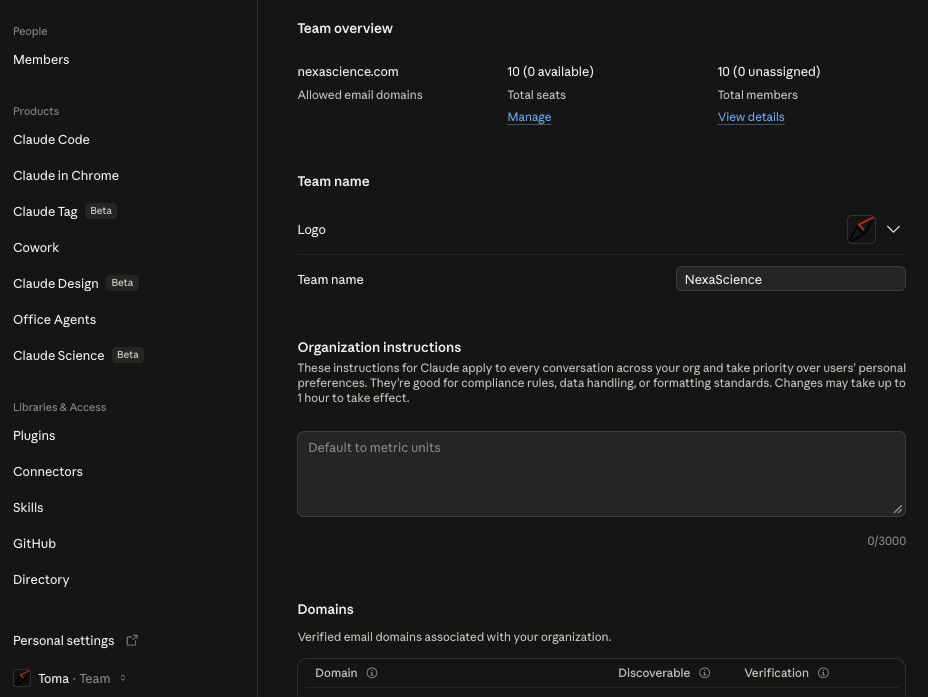
- Select Connectors in the sidebar
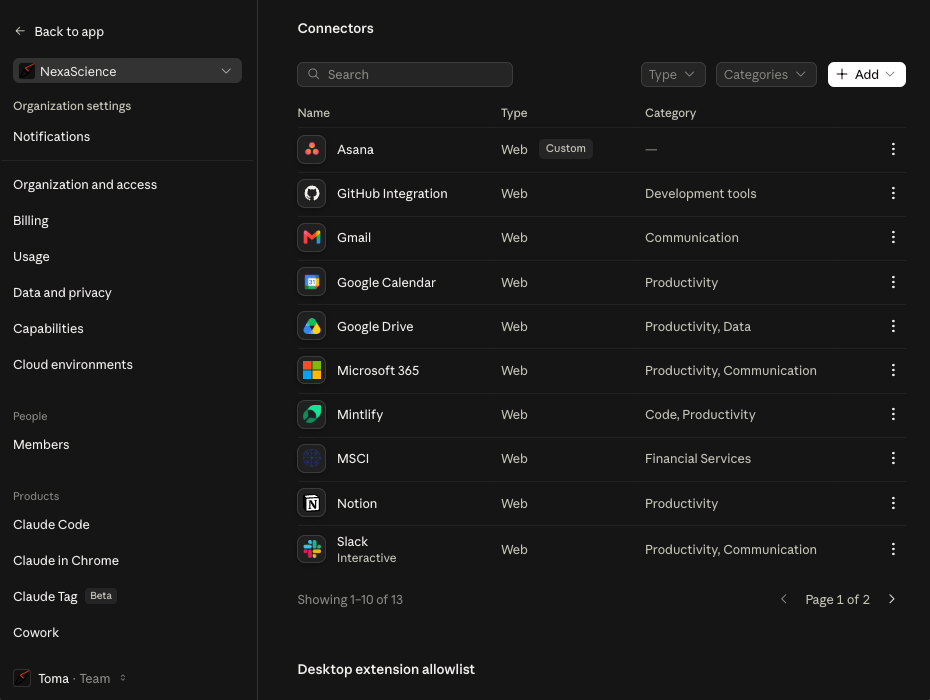
- Click + Add at the top right of the connector list
2. Add a custom connector
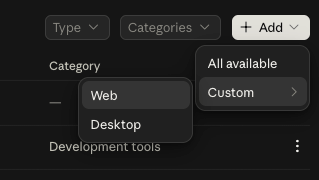
- Select Custom → Web from the Add menu
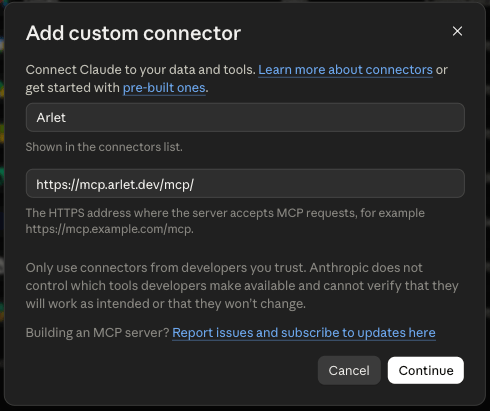
- Fill in the Add custom connector dialog and click Continue:
- Name:
Arlet - Remote MCP server URL:
https://mcp.arlet.dev/mcp/
- Name:
- The authentication settings are auto-detected from Arlet’s server, so keep the defaults (Authentication:
Always required, OAuth client:No client ID — register one automatically) and click Add
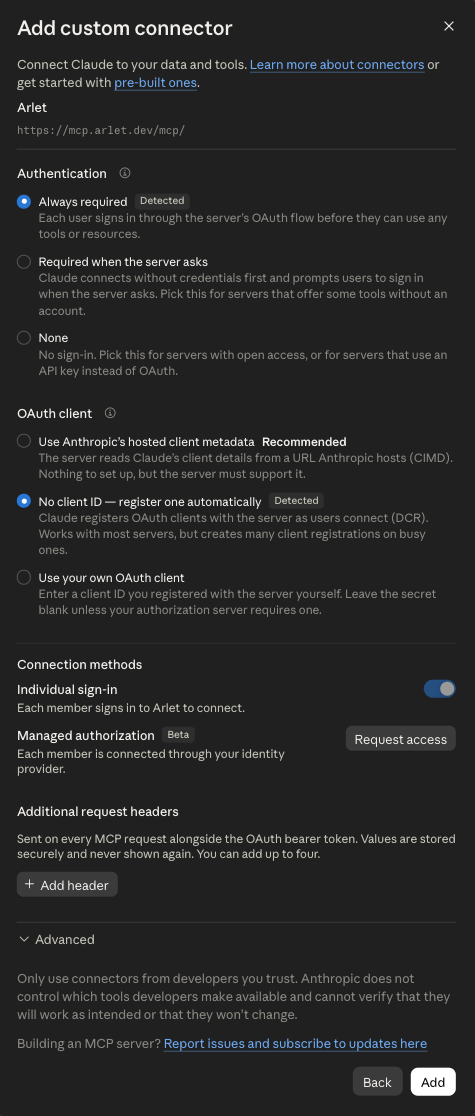
Claude registers an OAuth client automatically (Dynamic Client
Registration), so there is no need to enter a Client ID / Client Secret
manually.