> ## Documentation Index
> Fetch the complete documentation index at: https://docs.arlet.dev/llms.txt
> Use this file to discover all available pages before exploring further.

# Copilot Studio

> ArletをMicrosoft Copilot Studioと接続する方法

<Note>
  Microsoftの職場アカウントとCopilot
  Studioのライセンス（またはトライアル）が必要です。MCPサーバーを使うにはエージェントが生成オーケストレーション（generative
  orchestration）である必要があり、Teams版Copilot Studioでは利用できません。
</Note>

### 1. エージェントを用意する

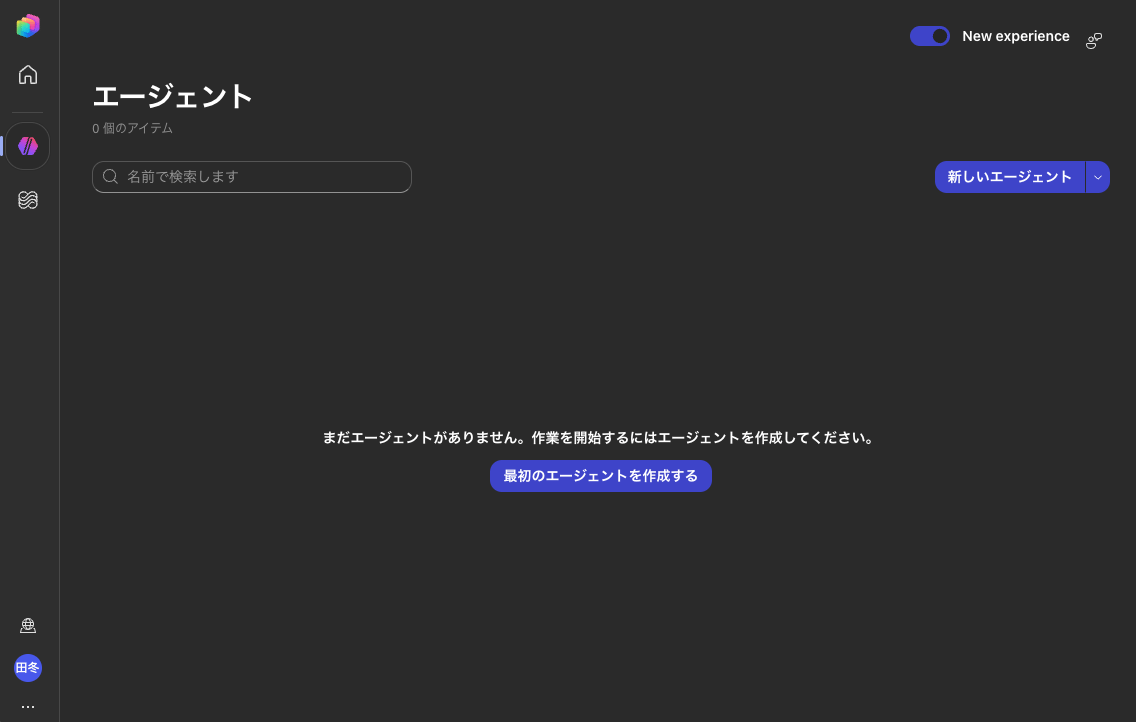
1. [Copilot Studio](https://copilotstudio.microsoft.com/)に職場アカウントでサインインし、**エージェント**ページで**新しいエージェント**をクリックします（既存のエージェントに追加する場合はそのエージェントを開きます）

<img src="https://mintcdn.com/nexascienceinc/0cswBeVmfX6Tdpee/images/copilot_studio/1.png?fit=max&auto=format&n=0cswBeVmfX6Tdpee&q=85&s=c25528902a43221cb3de5e3c73734bef" alt="エージェント一覧" style={{ maxWidth: '70%', display: 'block', margin: '0 auto' }} width="1136" height="722" data-path="images/copilot_studio/1.png" />

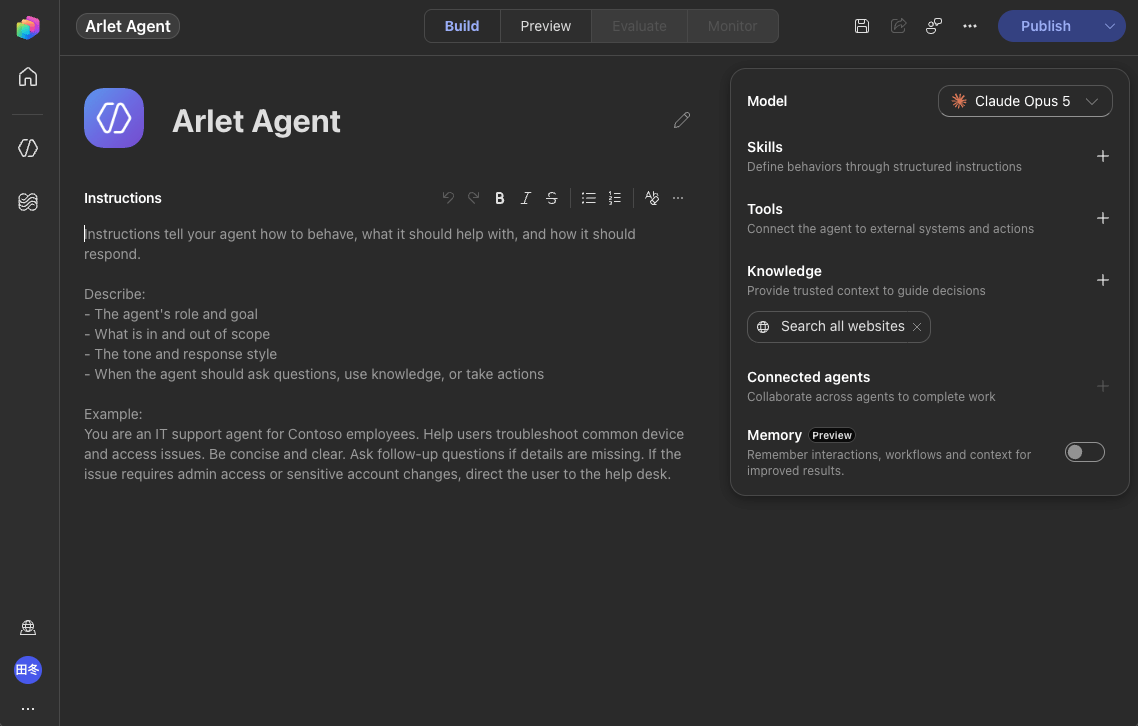
2. エージェントの編集画面（**Build**タブ）が開いたら、右パネルの**Tools**の\*\*+\*\*をクリックします

<img src="https://mintcdn.com/nexascienceinc/0cswBeVmfX6Tdpee/images/copilot_studio/2.png?fit=max&auto=format&n=0cswBeVmfX6Tdpee&q=85&s=cd08fcdd0a651b7af20f49b97c8204f0" alt="エージェントの編集画面" style={{ maxWidth: '70%', display: 'block', margin: '0 auto' }} width="1138" height="726" data-path="images/copilot_studio/2.png" />

### 2. MCPサーバーを追加する

1. **ツールの追加**ダイアログが開いたら、右上の\*\*+ 追加\*\*をクリックします
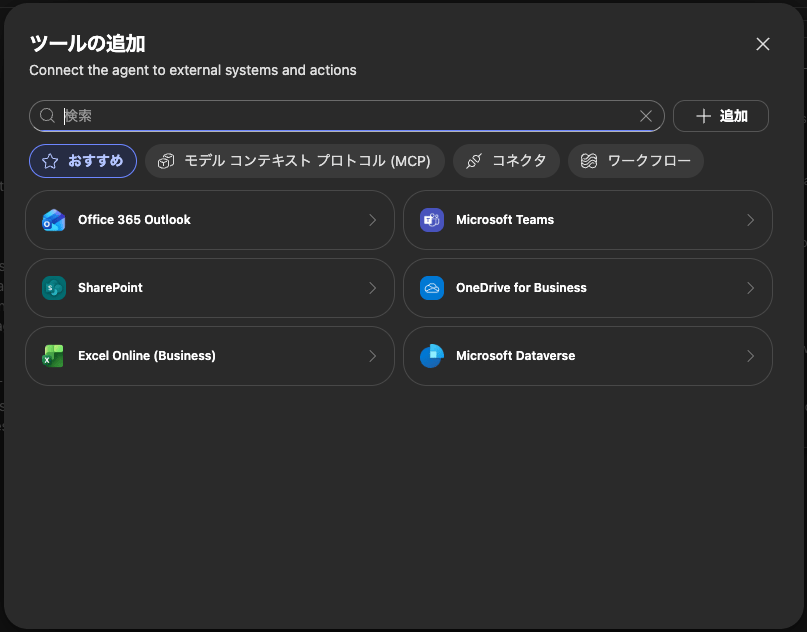
<img src="https://mintcdn.com/nexascienceinc/0cswBeVmfX6Tdpee/images/copilot_studio/3.png?fit=max&auto=format&n=0cswBeVmfX6Tdpee&q=85&s=dad38884557f7a4c73d32d4449b6c8c4" alt="ツールの追加ダイアログ" style={{ maxWidth: '70%', display: 'block', margin: '0 auto' }} width="807" height="632" data-path="images/copilot_studio/3.png" />

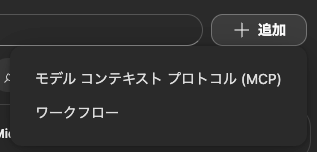
2. **モデル コンテキスト プロトコル (MCP)** を選択します

<img src="https://mintcdn.com/nexascienceinc/0cswBeVmfX6Tdpee/images/copilot_studio/4.png?fit=max&auto=format&n=0cswBeVmfX6Tdpee&q=85&s=98633b44b2c8ce715b30e27f35c32dee" alt="追加メニューのMCP選択" style={{ maxWidth: '70%', display: 'block', margin: '0 auto' }} width="317" height="152" data-path="images/copilot_studio/4.png" />

3. **MCP サーバーを追加**フォームに以下を入力し、**追加**をクリックします：

| 項目       | 値                                                                                   |
| -------- | ----------------------------------------------------------------------------------- |
| サーバー名    | `Arlet`                                                                             |
| サーバーの説明  | Arletの説明文（例：`Arlet is a platform for creating, hosting, and managing MCP servers.`） |
| サーバー URL | `https://mcp.arlet.dev/mcp/`                                                        |
| 認証       | `OAuth 2.0`                                                                         |
| 構成の種類    | `動的 (検出あり)`                                                                         |
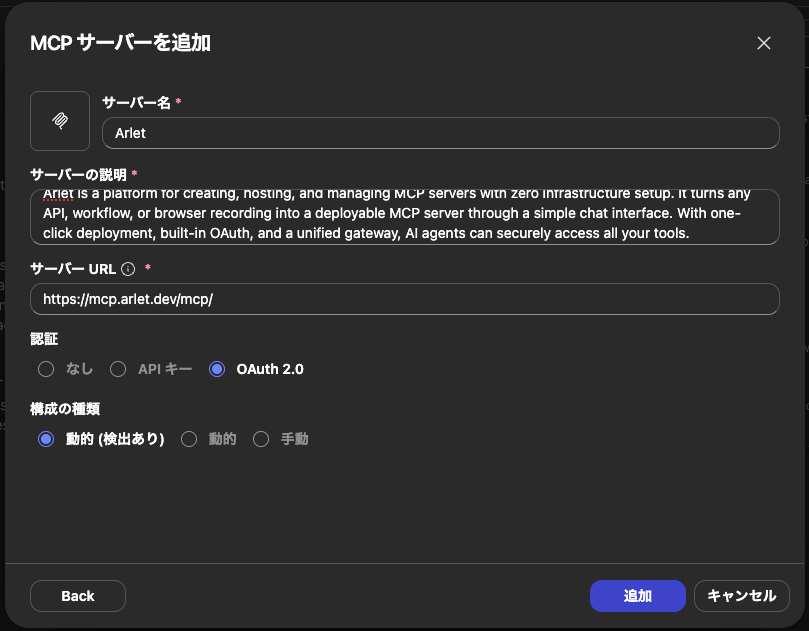
<img src="https://mintcdn.com/nexascienceinc/0cswBeVmfX6Tdpee/images/copilot_studio/5.png?fit=max&auto=format&n=0cswBeVmfX6Tdpee&q=85&s=a874e16ccdb7577fce96c669d6d32f44" alt="MCPサーバーを追加フォームの入力例" style={{ maxWidth: '70%', display: 'block', margin: '0 auto' }} width="809" height="631" data-path="images/copilot_studio/5.png" />

<Note>
  OAuthの構成はArletのサーバーから自動検出されるため、Client ID / Client
  Secretの手動入力は不要です。
</Note>

### 3. 接続を作成して認証する

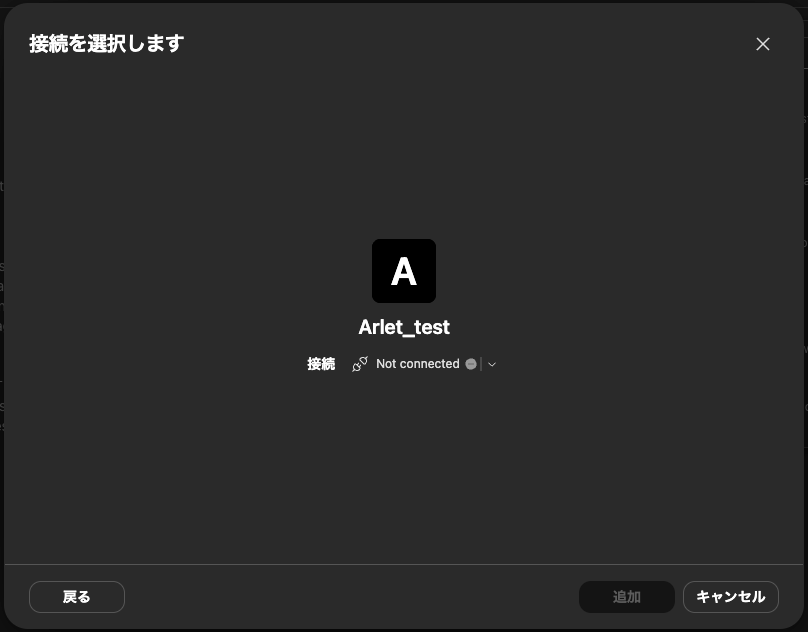
1. **接続を選択します**画面が表示されます。この時点では未接続（`Not connected`）です

<img src="https://mintcdn.com/nexascienceinc/0cswBeVmfX6Tdpee/images/copilot_studio/6.png?fit=max&auto=format&n=0cswBeVmfX6Tdpee&q=85&s=33c219d008a8346f0bee233c2a58e30f" alt="接続の選択画面" style={{ maxWidth: '70%', display: 'block', margin: '0 auto' }} width="808" height="632" data-path="images/copilot_studio/6.png" />

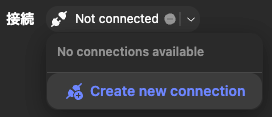
2. 接続のドロップダウンから**Create new connection**を選択します
<img src="https://mintcdn.com/nexascienceinc/0cswBeVmfX6Tdpee/images/copilot_studio/7.png?fit=max&auto=format&n=0cswBeVmfX6Tdpee&q=85&s=1e40fde5ccbc425d90581daa7106ef27" alt="Create new connection" style={{ maxWidth: '70%', display: 'block', margin: '0 auto' }} width="272" height="117" data-path="images/copilot_studio/7.png" />

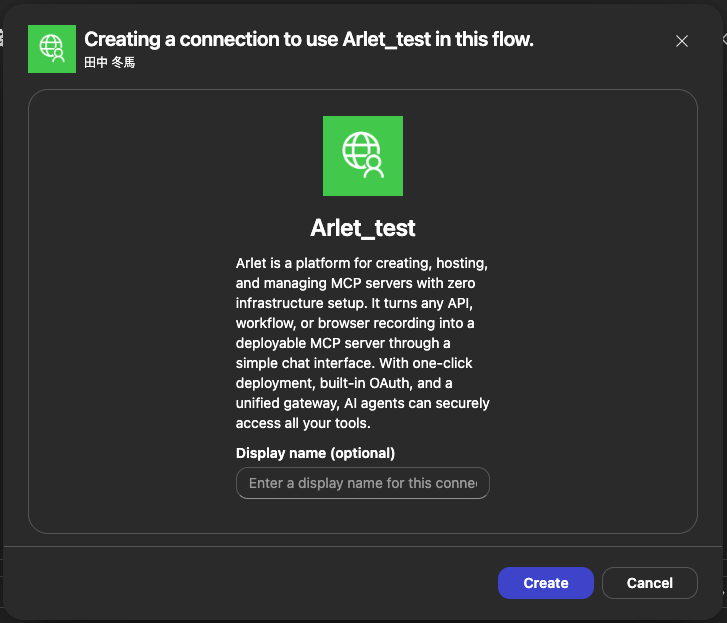
3. 接続の作成ダイアログで**Create**をクリックします

<img src="https://mintcdn.com/nexascienceinc/0cswBeVmfX6Tdpee/images/copilot_studio/8.png?fit=max&auto=format&n=0cswBeVmfX6Tdpee&q=85&s=6e82ccf76befa3eef8ac3211b8860e16" alt="接続の作成ダイアログ" style={{ maxWidth: '70%', display: 'block', margin: '0 auto' }} width="727" height="623" data-path="images/copilot_studio/8.png" />

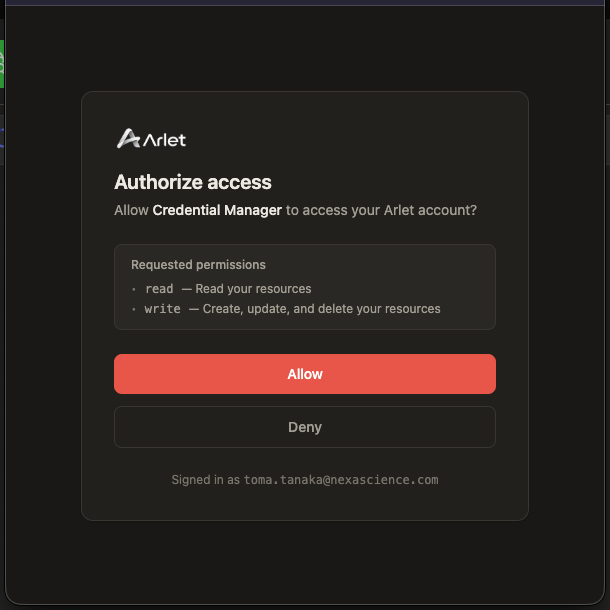
4. Arletの認可画面が開きます。サインインしていない場合はGoogleでサインインし、**Allow**をクリックします
<img src="https://mintcdn.com/nexascienceinc/0cswBeVmfX6Tdpee/images/copilot_studio/9.png?fit=max&auto=format&n=0cswBeVmfX6Tdpee&q=85&s=afda24df17129560d04c41554b9454e4" alt="Arletの認可画面" style={{ maxWidth: '70%', display: 'block', margin: '0 auto' }} width="610" height="610" data-path="images/copilot_studio/9.png" />

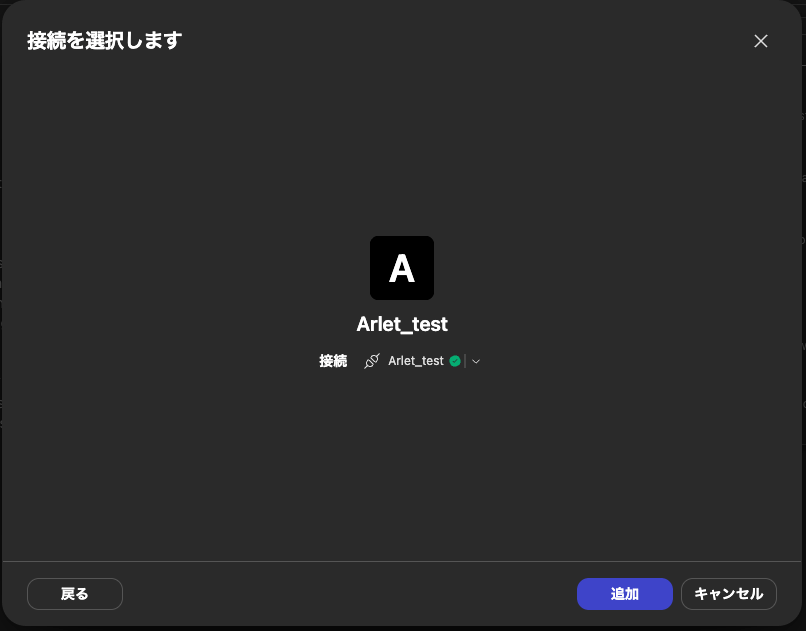
5. 接続が完了したら（緑のチェックが表示されます）、**追加**をクリックしてツールをエージェントに追加します

<img src="https://mintcdn.com/nexascienceinc/0cswBeVmfX6Tdpee/images/copilot_studio/10.png?fit=max&auto=format&n=0cswBeVmfX6Tdpee&q=85&s=f77ae2e614fd413c99bc2d868dd09cab" alt="接続完了後の選択画面" style={{ maxWidth: '70%', display: 'block', margin: '0 auto' }} width="806" height="631" data-path="images/copilot_studio/10.png" />

### 4. エージェントを公開して使う

1. 編集画面右上の**Publish**をクリックします

<img src="https://mintcdn.com/nexascienceinc/0cswBeVmfX6Tdpee/images/copilot_studio/11.png?fit=max&auto=format&n=0cswBeVmfX6Tdpee&q=85&s=5988907a0ff2142bbc5219aa6a4f6dda" alt="Publishボタン" style={{ maxWidth: '70%', display: 'block', margin: '0 auto' }} width="138" height="42" data-path="images/copilot_studio/11.png" />

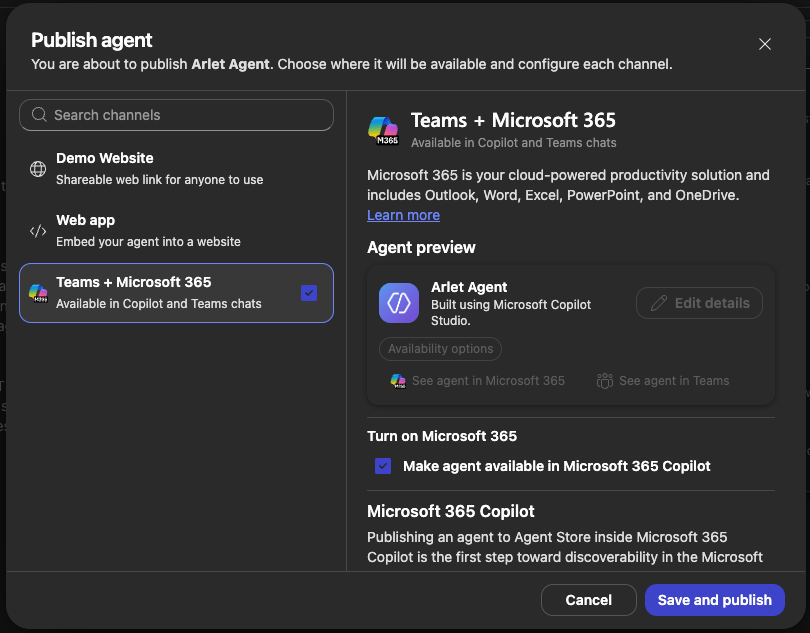
2. 公開先のチャネル（例：**Teams + Microsoft 365**）を選択し、**Save and publish**をクリックします。Microsoft 365 Copilotで使う場合は**Make agent available in Microsoft 365 Copilot**にチェックを入れます
<img src="https://mintcdn.com/nexascienceinc/0cswBeVmfX6Tdpee/images/copilot_studio/12.png?fit=max&auto=format&n=0cswBeVmfX6Tdpee&q=85&s=0f1c292f18afd523c4e2d71f146bd33f" alt="Publish agentダイアログ" style={{ maxWidth: '70%', display: 'block', margin: '0 auto' }} width="810" height="633" data-path="images/copilot_studio/12.png" />

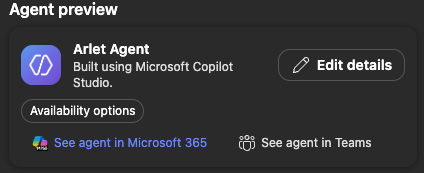
3. 公開が完了したら、**See agent in Microsoft 365**からエージェントを開けます
<img src="https://mintcdn.com/nexascienceinc/0cswBeVmfX6Tdpee/images/copilot_studio/13.png?fit=max&auto=format&n=0cswBeVmfX6Tdpee&q=85&s=6d39045f1f3d4180f036ee0de24f360f" alt="Agent preview" style={{ maxWidth: '70%', display: 'block', margin: '0 auto' }} width="424" height="173" data-path="images/copilot_studio/13.png" />

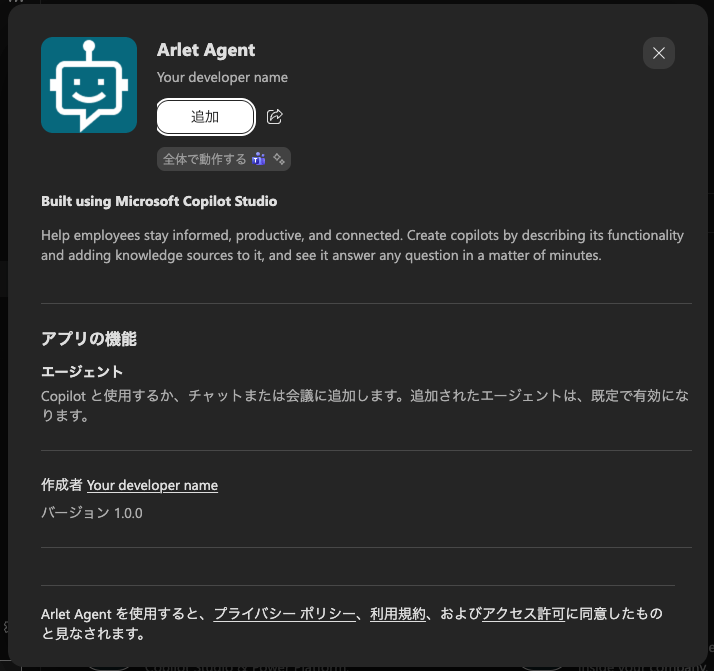
4. Microsoft 365 Copilot側でエージェントの**追加**をクリックします
<img src="https://mintcdn.com/nexascienceinc/0cswBeVmfX6Tdpee/images/copilot_studio/14.png?fit=max&auto=format&n=0cswBeVmfX6Tdpee&q=85&s=2b70215000b8916d98932c5687d7d68a" alt="エージェントの追加ダイアログ" style={{ maxWidth: '70%', display: 'block', margin: '0 auto' }} width="714" height="671" data-path="images/copilot_studio/14.png" />

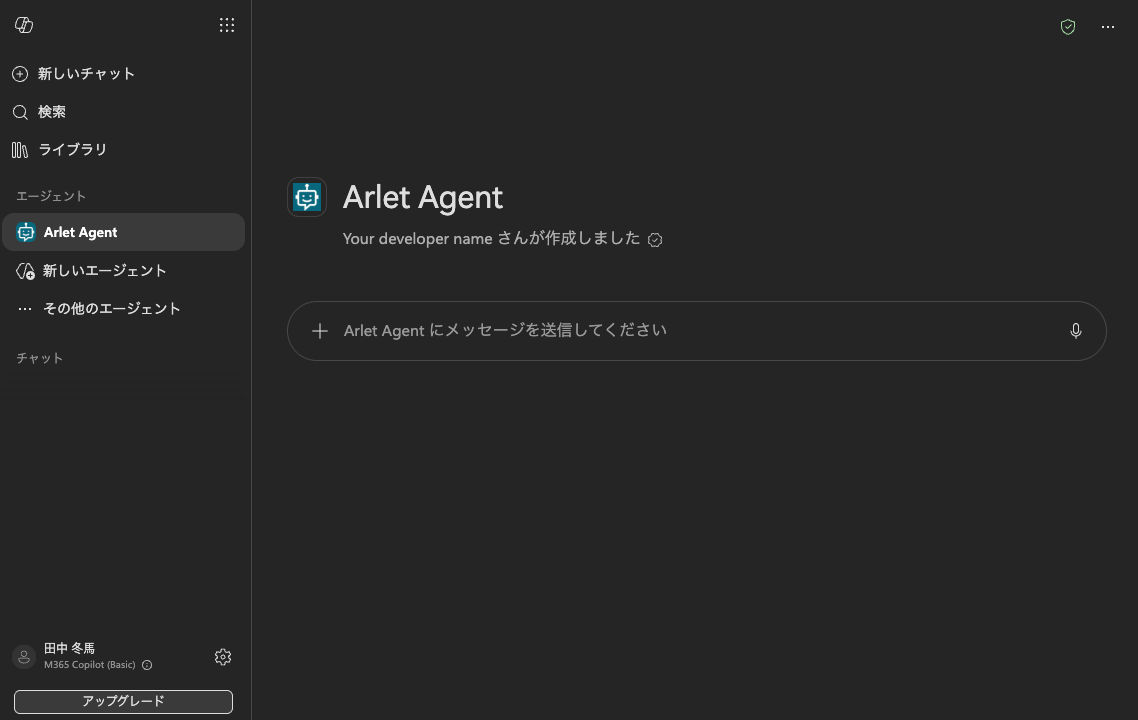
5. Microsoft 365 CopilotでArletのツールを使ったチャットができるようになります
<img src="https://mintcdn.com/nexascienceinc/0cswBeVmfX6Tdpee/images/copilot_studio/15.png?fit=max&auto=format&n=0cswBeVmfX6Tdpee&q=85&s=0b5f0dc8e9040d60fa0c55658ede69be" alt="Microsoft 365 Copilotでの利用" style={{ maxWidth: '70%', display: 'block', margin: '0 auto' }} width="1138" height="720" data-path="images/copilot_studio/15.png" />