> ## Documentation Index
> Fetch the complete documentation index at: https://docs.arlet.dev/llms.txt
> Use this file to discover all available pages before exploring further.
# Claude
> ArletをClaude.aiおよびClaude for Desktopと接続する方法
以下はTeam /
Enterpriseプランの組織管理者がコネクターを追加する手順です。Pro /
Maxプランでは、**Settings** →
**Connectors**から同様の手順で個人用に追加できます。
### 1. コネクター管理画面を開く
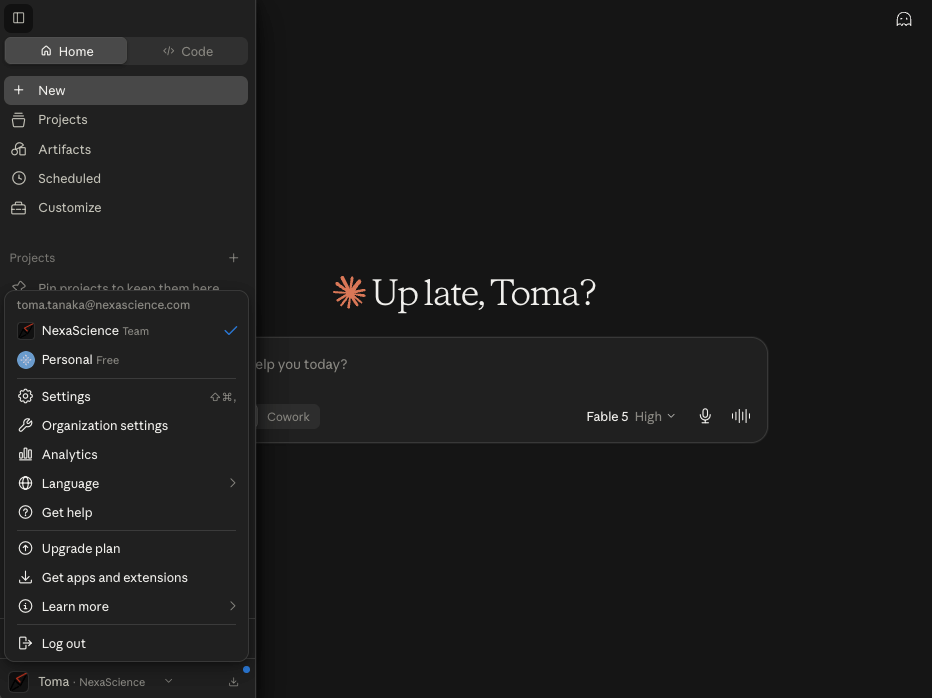
1. [Claude](https://claude.ai/)にサインインし、左下のアカウントメニューから**Organization settings**を開きます
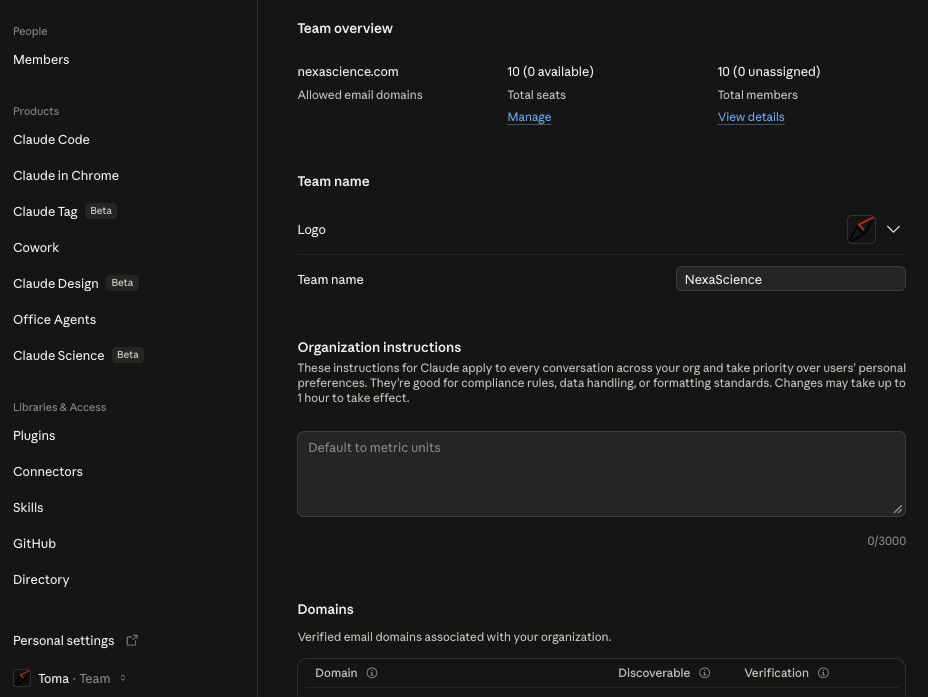
 2. サイドバーの**Connectors**を選択します
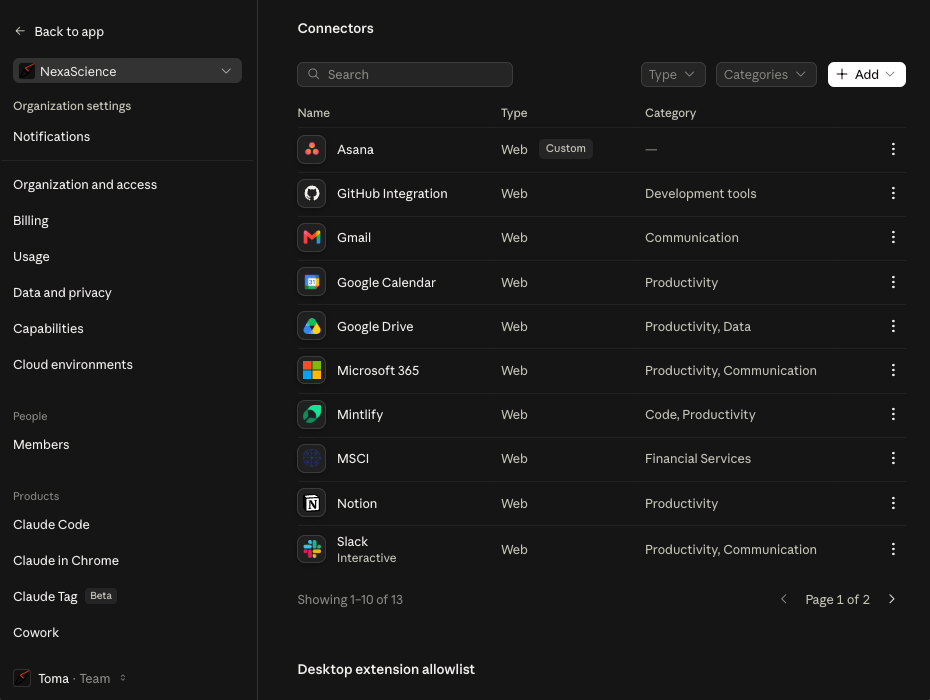
 3. コネクター一覧の右上にある\*\*+ Add\*\*をクリックします
 ### 2. カスタムコネクターを追加する
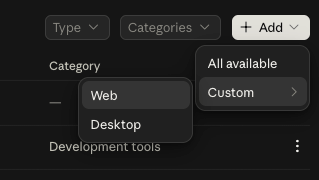
1. **Add**メニューから**Custom** → **Web**を選択します
### 2. カスタムコネクターを追加する
1. **Add**メニューから**Custom** → **Web**を選択します
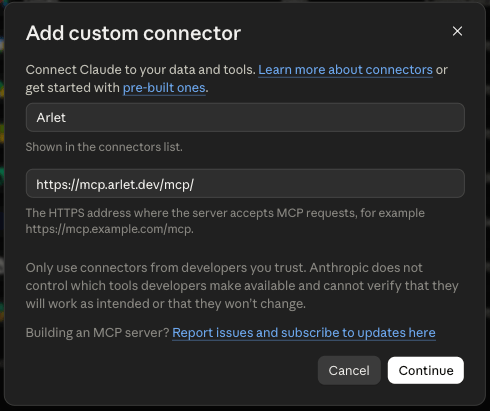
 2. **Add custom connector**ダイアログに以下を入力し、**Continue**をクリックします:
* **Name**: `Arlet`
* **Remote MCP server URL**: `https://mcp.arlet.dev/mcp/`
2. **Add custom connector**ダイアログに以下を入力し、**Continue**をクリックします:
* **Name**: `Arlet`
* **Remote MCP server URL**: `https://mcp.arlet.dev/mcp/`
 3. 認証設定はArletのサーバーから自動検出されるため、既定のまま(**Authentication**: `Always required`、**OAuth client**: `No client ID — register one automatically`)**Add**をクリックします
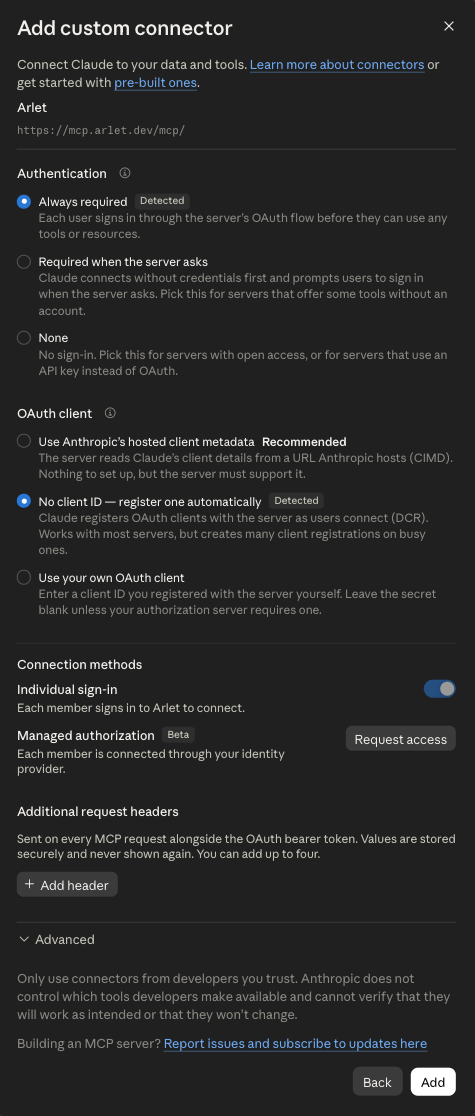 ClaudeはOAuthクライアントを自動登録(Dynamic Client
Registration)するため、Client ID / Client Secretの手動入力は不要です。
### 3. 認証
追加したArletコネクターを初めて使うときに、各ユーザーが認証を求められます。Googleでサインインし、OAuthフローを完了してください。
ClaudeはOAuthクライアントを自動登録(Dynamic Client
Registration)するため、Client ID / Client Secretの手動入力は不要です。
### 3. 認証
追加したArletコネクターを初めて使うときに、各ユーザーが認証を求められます。Googleでサインインし、OAuthフローを完了してください。