> ## Documentation Index
> Fetch the complete documentation index at: https://docs.arlet.dev/llms.txt
> Use this file to discover all available pages before exploring further.
# Claude
> How to connect Arlet with Claude.ai and Claude for Desktop
The steps below are for organization admins on Team / Enterprise plans. On
Pro / Max plans, you can add the connector for yourself from **Settings** →
**Connectors** with the same steps.
### 1. Open the connector management screen
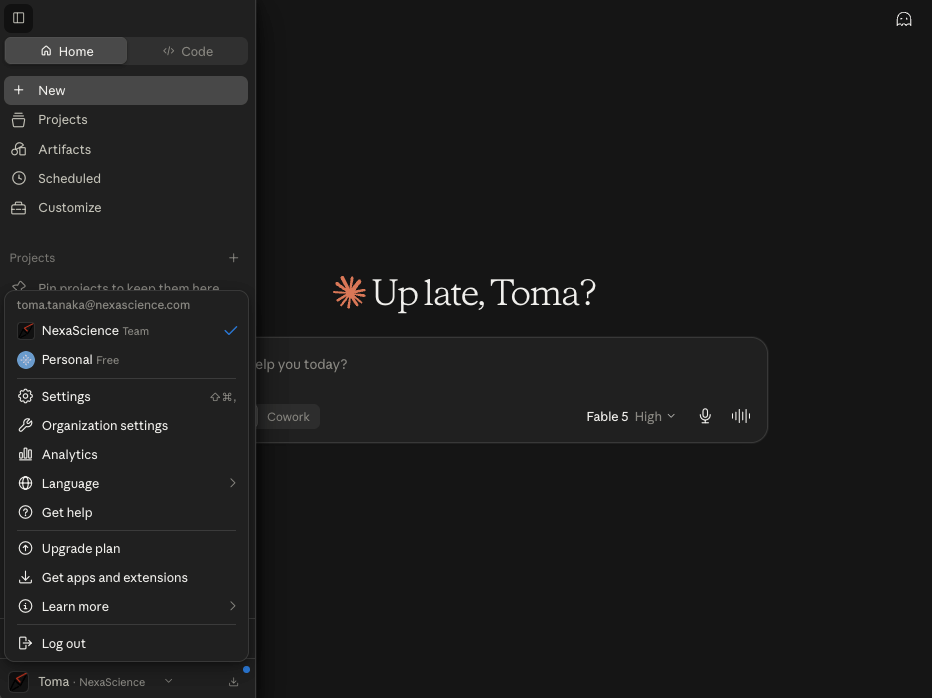
1. Sign in to [Claude](https://claude.ai/) and open **Organization settings** from the account menu at the bottom left
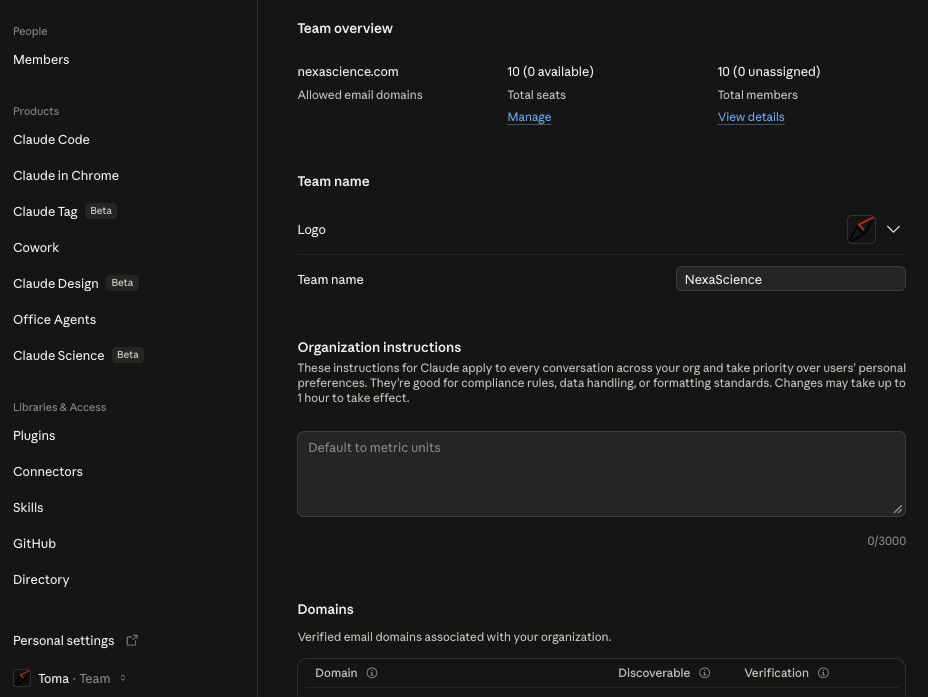
 2. Select **Connectors** in the sidebar
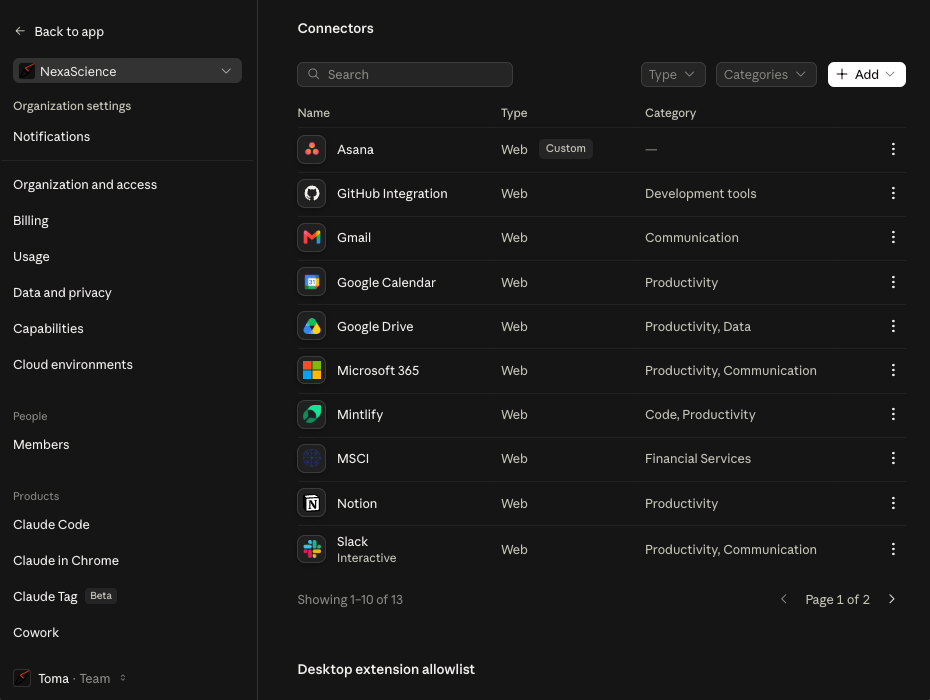
 3. Click **+ Add** at the top right of the connector list
 ### 2. Add a custom connector
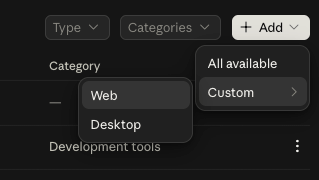
1. Select **Custom** → **Web** from the **Add** menu
### 2. Add a custom connector
1. Select **Custom** → **Web** from the **Add** menu
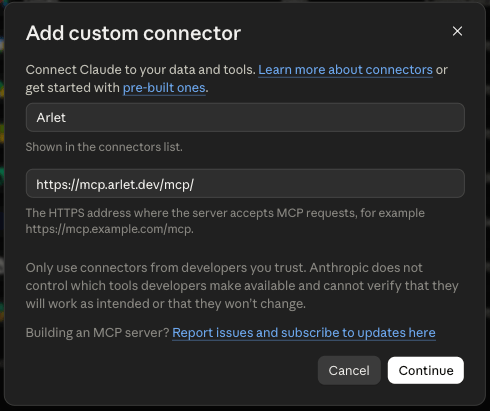
 2. Fill in the **Add custom connector** dialog and click **Continue**:
* **Name**: `Arlet`
* **Remote MCP server URL**: `https://mcp.arlet.dev/mcp/`
2. Fill in the **Add custom connector** dialog and click **Continue**:
* **Name**: `Arlet`
* **Remote MCP server URL**: `https://mcp.arlet.dev/mcp/`
 3. The authentication settings are auto-detected from Arlet's server, so keep the defaults (**Authentication**: `Always required`, **OAuth client**: `No client ID — register one automatically`) and click **Add**
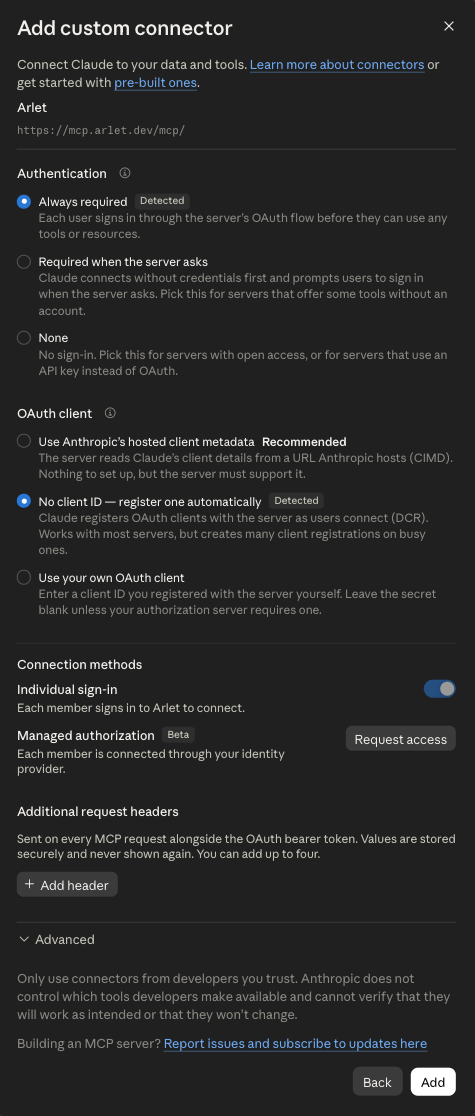 Claude registers an OAuth client automatically (Dynamic Client
Registration), so there is no need to enter a Client ID / Client Secret
manually.
### 3. Authentication
Each user is asked to authenticate the first time they use the Arlet connector. Sign in with Google and complete the OAuth flow.
Claude registers an OAuth client automatically (Dynamic Client
Registration), so there is no need to enter a Client ID / Client Secret
manually.
### 3. Authentication
Each user is asked to authenticate the first time they use the Arlet connector. Sign in with Google and complete the OAuth flow.